How to Create High-Converting Google Ads in Minutes with AdMinds (Step-by-Step Guide)
By AdMinds
How to Create High-Converting Google Ads in Minutes with AdMinds (Step-by-Step Guide)
Running Google Ads and creating Responsive Search Ads (RSA) can feel overwhelming.
You open the dashboard, stare at the blank ad group form, and suddenly you're expected to be a strategist, copywriter, keyword researcher, and performance marketer — all at once.
That's exactly why we built AdMinds.
AdMinds is not just another AI writing tool. It's an AI assistant designed specifically for Google Ads workflows. It understands campaigns, ad groups, keywords, tone, and objectives — and helps you turn ideas into ready-to-publish ad drafts in minutes.
In this tutorial, I'll walk you through exactly how to use AdMinds to generate, optimize, and publish a Google Ads ad group the right way.
Step 1: Connect Your Google Ads Account
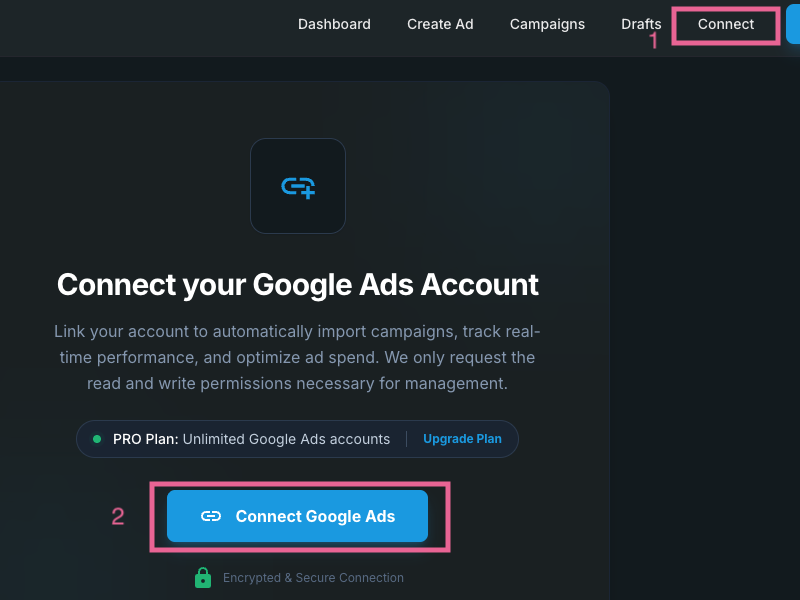
Caption: Connect your Google Ads account from the AdMinds Connect menu in seconds.
When you log into AdMinds for the first time, the process is simple.
Go to the top menu and choose Connect. Then click Connect Google Ads.
That's it.
Within seconds, AdMinds securely connects to your Google Ads account. No complicated integrations. No technical setup. No exporting and importing spreadsheets.
Once connected, you're ready to work directly with your campaigns.
Step 2: Select Your Manager Account and Customer Account

Caption: Select your Manager Account and the customer account you want to work with.
After connecting, you'll see your Google Ads Manager Account. Select it, and AdMinds will automatically display all associated customer accounts.
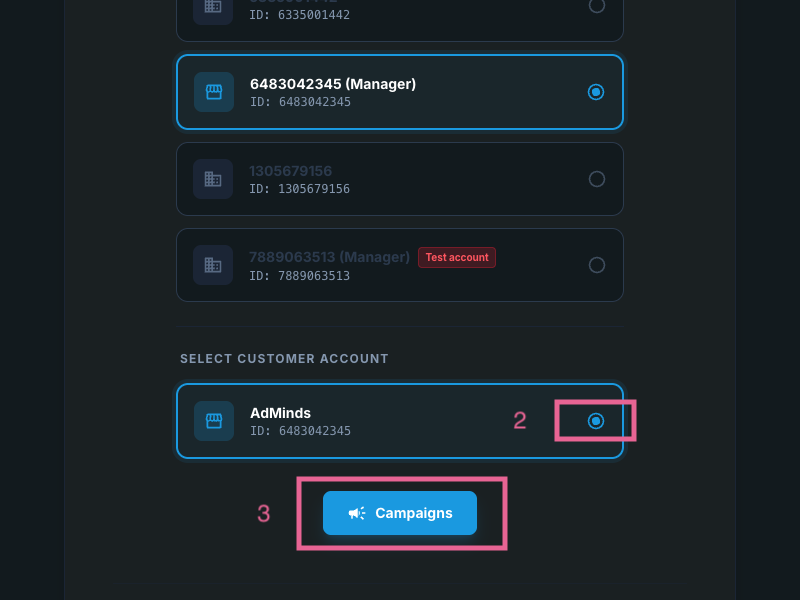
Caption: Choose customer account and load Campaigns.
Choose the customer account you want to work with.
We assume you've already created at least one campaign inside Google Ads using the standard Google interface. If you have, AdMinds will detect it and load it instantly.
From here, everything becomes much smoother.
Step 3: Open Campaigns and Choose Where to Create Your Ad

Caption: Open Campaigns, view your campaigns, and click Create Ad to start building your ad group.
Navigate to the Campaigns section in the menu.
You'll see a clean overview of your existing campaigns, including useful information like the number of ad groups, budget status, and campaign state. Instead of jumping between tabs inside Google Ads, you now have clarity in one place.
Select the campaign you want to expand and click Create Ad.
This is where the real power of AdMinds begins.
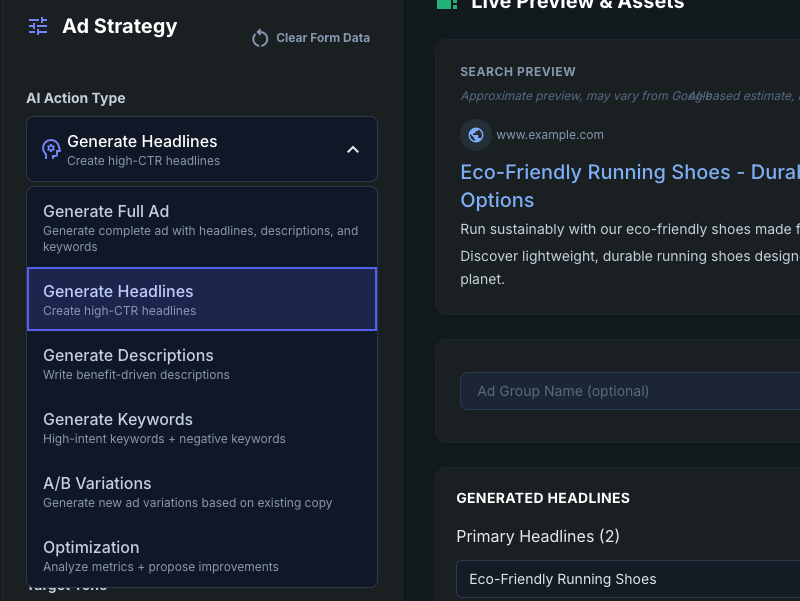
Step 4: Describe Your Strategy — Let AI Do the Heavy Lifting
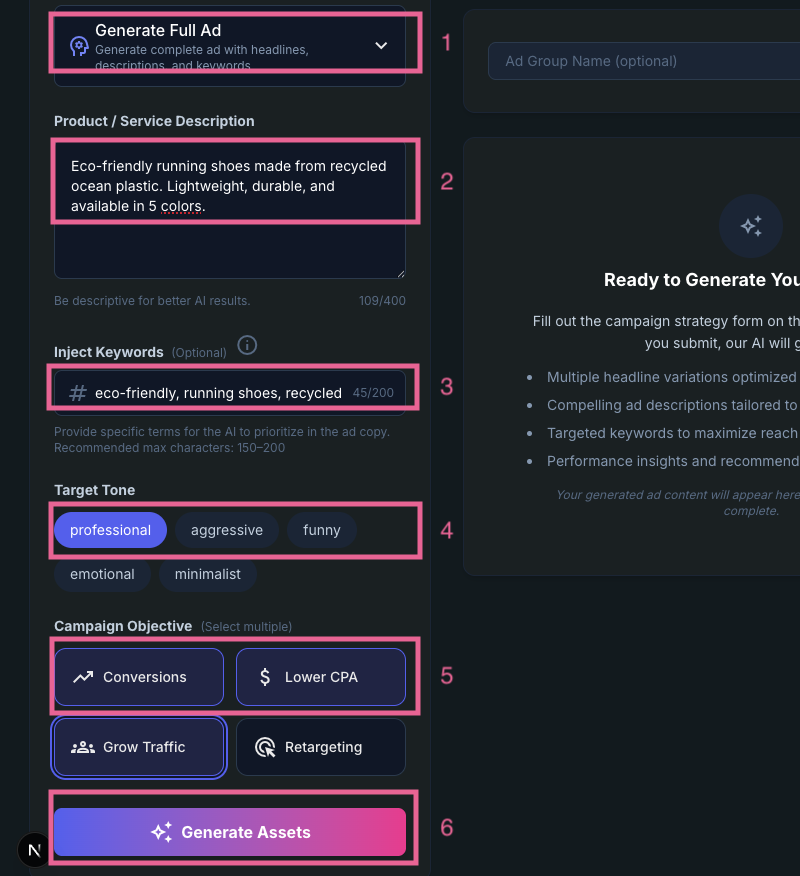
Caption: Fill out the Ad Strategy form with your product, keywords, tone, and objective, then choose Generate Full Ad.
Before generating your ad, you'll fill out the Ad Strategy form.
This step is important — but it's not complicated.
Simply describe your product or service clearly. Think about what makes it valuable. Who is it for? What problem does it solve?
Then inject your target keywords. If you're unsure how to choose the right keywords, see our PPC hacks for small budgets for keyword and match-type tips.
Next, select your target tone. Do you want to sound professional, friendly, persuasive, confident, bold? The tone shapes the emotional impact of your ad.
Finally, choose your campaign objective and select Generate Full Ad from the dropdown.
The more specific you are in this step, the better your results will be.
AdMinds works like a professional copywriter. Give it a clear brief, and it delivers high-quality structured output.
Step 5: Review Your AI-Generated Ad Group
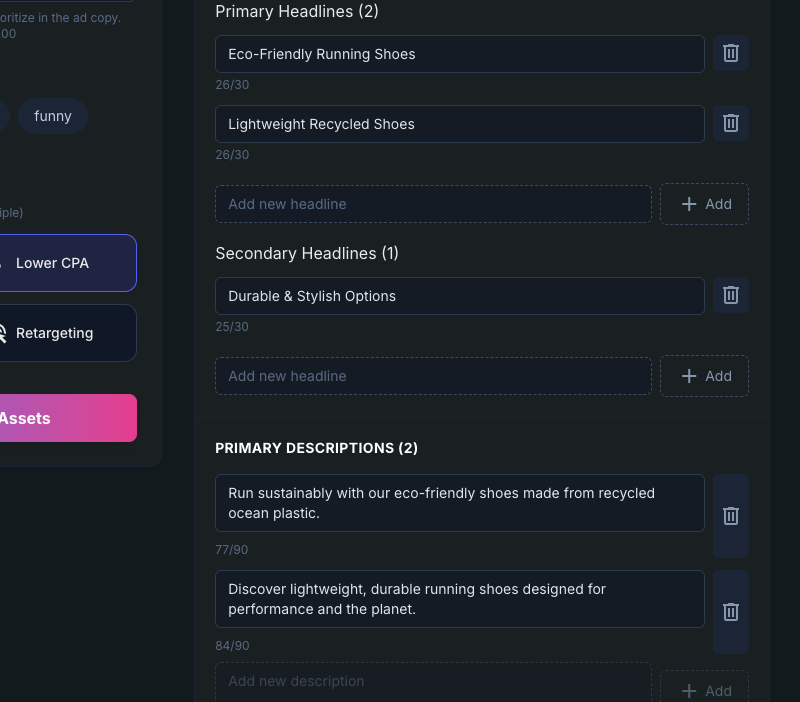
Caption: Review your AI-generated headlines, descriptions, and structured content before refining.
Once submitted, AdMinds instantly generates your ad group.
Headlines, descriptions, structured content — all automatically filled into the form.
Instead of starting from zero, you're now refining a professional draft.
This alone can save you hours across multiple campaigns.
But here's the key: AdMinds doesn't replace your judgment. It enhances it.
Step 6: Refine and Optimize for Better Performance
Caption: Refine and optimize by regenerating specific elements or editing manually for better performance.
For the best results, take a few minutes to review what the AI generated.
You can regenerate specific elements — headlines, descriptions, or keywords — directly from the dropdown options inside the Ad Strategy form. If one headline feels slightly off, regenerate just that section. If you want a stronger call to action, adjust it manually.
This hybrid workflow — AI speed plus human strategy — is where real performance gains happen.
You're no longer stuck writing from scratch. You're optimizing intelligently.
Step 7: Publish or Save as Draft
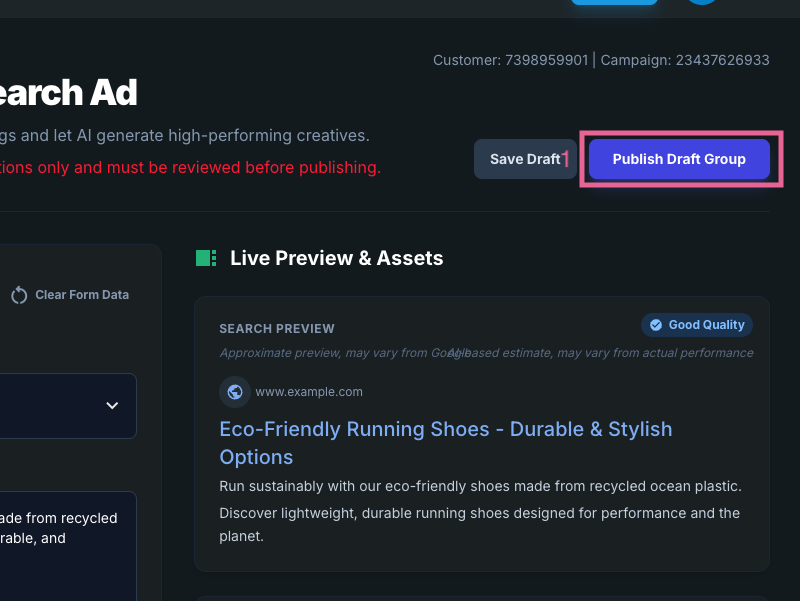
Caption: Publish your ad group to Google Ads or save it as a draft for later.
When you're satisfied with the ad group, you can publish it directly to your selected campaign or save it as a draft inside AdMinds.
After publishing, head to your Google Ads interface. You may need to refresh the page to see the newly posted draft. From there, you can make any final adjustments inside Google's UI and officially publish your ad group.
Simple. Controlled. Efficient.
Next steps: For more on structuring your ad copy, read Setting up your first Responsive Search Ad the right way. Ready to create high-converting ads in minutes? Get started with AdMinds.